We've had nothing but positively fun experiences using our new review product,
HISTORY Through the Ages Project Passport World History Study: Renaissance & Reformation from
Home School in the Woods. This exceptional hands-on study really brought our History lessons to life with a wide variety of activities and projects to complete including but not limited to lapbooking, notebooking, recipes, file folder games, art projects, crafts, MP3 audio tours, creative writing, coloring, mapping, and timeline figures. Last year the
Middle Ages review study was a blast! I can assure you that Renaissance & Reformation study will NOT disappoint you. You can journey back into time with this fun-filled adventurous study which was designed by homeschool mom, Amy Pak, for children in 3rd-8th grade. However, it could definitely be utilized with younger or older students with minor adjustments.
Product Description
I received the product as a
digital download with printable files in PDF format so you'll need an updated version of Adobe Reader to read the files. This comprehensive study includes everything you need for a complete study of this time period.
The Renaissance & Reformation study includes 25 numbered stops which is designed to last 8-12 weeks depending on how you schedule the stops. It contains
over 50 activities to pick and choose from each day. There are helpful photos of the finished projects for you to view. You can stretch out the content to last as long as you desire or work as indicated in
Travel Planner. One stop is equivalent to one lesson. These lessons are sure to spark your child's interest and encourage them to learn about the time period. Each stop contains a plethora of hands-on projects which will deepen their understanding of the topic. The unit study stops consists of Guide Book Texts, Masters with Teacher Keys, and Travel Itineraries with step-by-step project directions.
Just a Few of the Topics Addressed
- Humanism
- Renaissance Meaning
- Italian City States
- Renaissance Italy
- Florence
- Cosimo Medici
- Renaissance Art (Leonardo da Vinci, Michelangelo, Etc.)
- Renaissance Music (Composers and Types of Music)
- Science, Astronomy, Inventions, and Math
- Literature and Drama
- Early Reformers (Martin Luther)
- Conflict and War (Thirty Years' and Civil War)
- Exploration
- Henry VIII and Family
- Zwingli and Switzerland
- John Calvin
- France and the Wars of Religion
- Knox and Scotland
- Counter Reformation
- Every Day Life: Clothing, Family, Food, Social Classes, Crime/Punishment, and Entertainment)
- And So Much More
How We Used Renaissance & Reformation
I used the Renaissance & Reformation study with Alyssa (Age 9) who works at a 3rd-5th grade level. She is at the lower end of the recommended grade level, but because she reads at a higher level and would be working with me I felt like it would be a suitable study perfect for her needs.
I received an email which contained a zip file and instructions for accessing unit study materials. You will need an application to help you "unzip" files if it isn't already available on your computer. I opened,
unzipped, and saved the downloadable files on our MAC OS X 10.6.8 computer using Chrome as our main browser. The digital download is compatible with PC and MAC computers. First, I skimmed through the organized folders so I could get familiar with the layout again and view the contents in order to plan our lessons. It may be a little overwhelming at first, but after you look at the layout of the study you'll understand how to implement it better.
This study replaced Alyssa's current History curriculum. It served as her core standalone World History curriculum. You could easily use it as a supplement to your current studies. My daughter definitely needed a change or a break from her current study. This Project Passport study brought History back to life this year. We haven't addressed the Renaissance and Reformation time period yet but it was of high interest and a great study to follow up with after our Middle Ages study.
I adjusted the amount of work we hoped to accomplish during this review period, because my daughter ended up having strep with high fevers followed by a horrible cold and winter allergies. We took more breaks and spread the activities out more.
We worked through content 3-4 times per week completing 1-2 stops each week. One stop was usually broken into 2 sessions. Our stops overlapped at times, because some projects took longer to complete. We wanted to move forward and learn more about the time period. We studied the content in chronological order. We spent 30 minutes to 1 1/2 hours per session depending on the project details and requirements.
I quickly read through the
Introduction and
Teacher Tips. I highly suggest reading these sections before beginning the study to familiarize yourself with the format. My daughter helped me gather frequently used supplies based on the provided list below. Most of these supplies were found around the house. There are additional supplies needed for art projects and crafts.


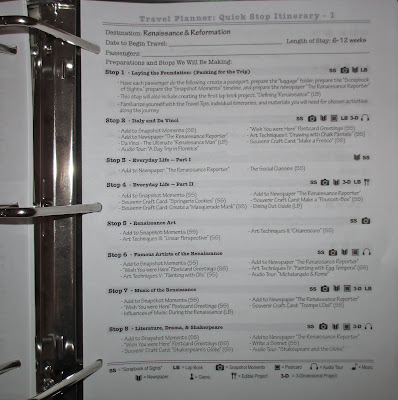
We were able to pick and choose projects from the 3-page Travel Planner: Quick Stop Itinerary based on Alyssa's interests, supplies at home, and what I wanted to emphasize. The Quick Stop Itinerary showed all 25 stops at a glance. I decided to print materials two stops at a time. After seeing all of the activities included, my daughter's excitement grew. We visited our local library to search for books and resources mentioned on the Additional Resource List. We hope to find and read more age-appropriate literature related to this time period as we continue traveling through the study.
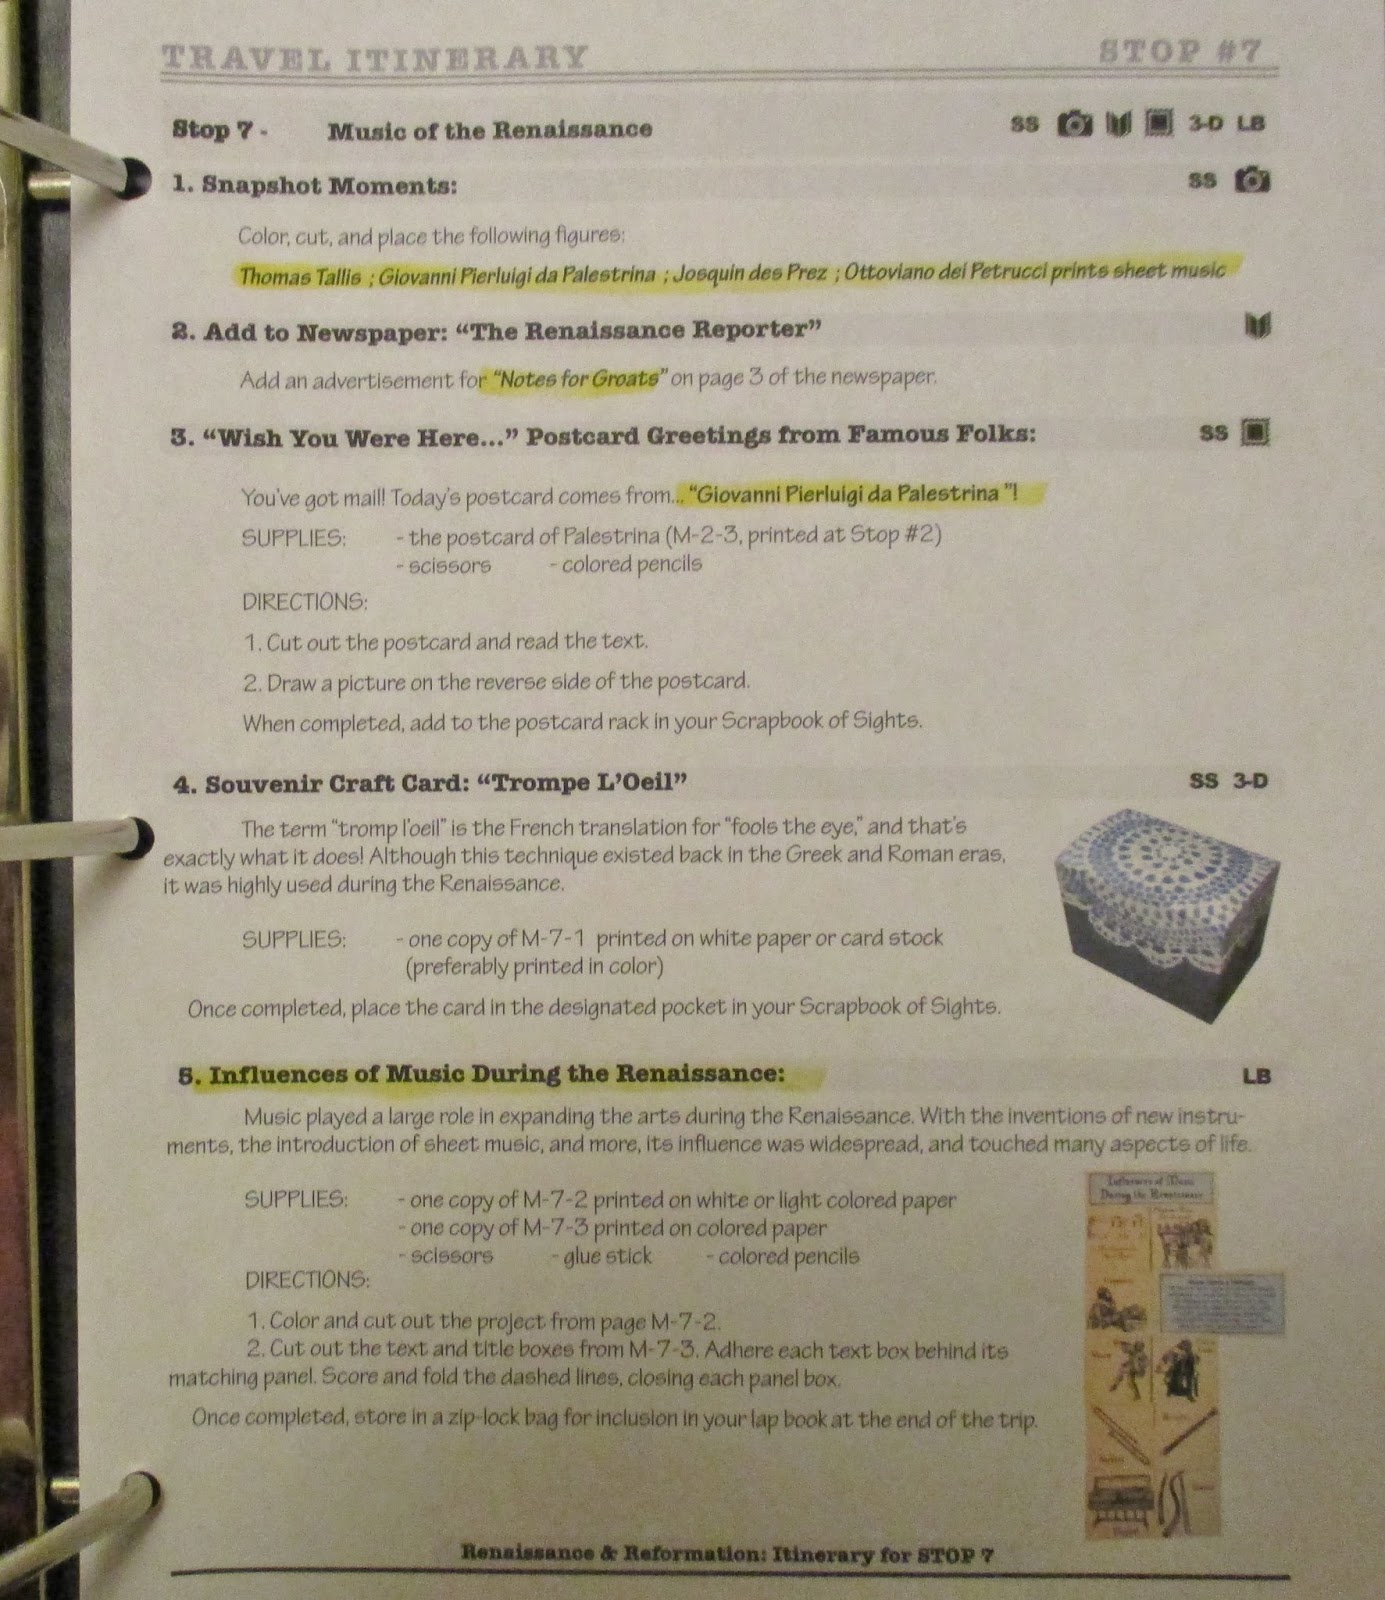
We snuggled on the couch or floor to read the background material aloud from the Guide Book Text together making stops along the way. We took turns reading paragraphs or sections. The Guide Book Text provided the lesson topic content and the Travel Itineraries listed individual projects and detailed activities related to each stop. I highlighted completed assignments and projects so that I could track what still needed to be done. A key of codes is provided which identifies icons which represent the different types of activities. There is a lot of prep in the beginning, but the results and learning that takes place makes it worth the effort. I would spend a day prepping binder and printable materials and another day to gather books at the library and art supplies. All of the materials above were stored in my 3" teacher binder with the Travel Itineraries following the Guide Book Texts.
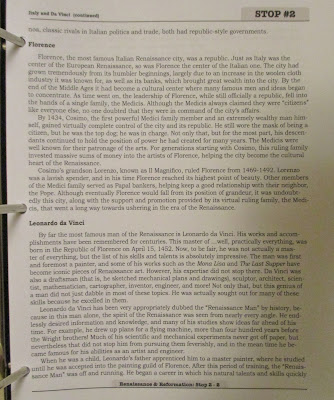 |
| Guide Book Read Aloud Text |
Alyssa's first hands-on activity was to create her Passport and Luggage Folder. There was a place inside the passport for a drawing or photo of your child. For the purposes of this review, we did NOT write in our physical address. I helped her with cutting the smaller areas with an Exacto knife. The luggage folder contains sheets to record her experiences at the end of the study. You'll need to help younger children with measuring cutting the luggage. At the end of the study, she'll write about her favorite experiences.
The
Scrapbook of Sights binder enabled her to record relevant information about important people, places, and events using the notebooking technique. This binder stored
ALL of her work including her
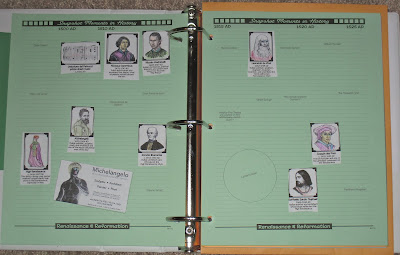
Snapshot Moments in History Scrapbook Timeline and her
Renaissance Reporter Newspaper.
She also made a
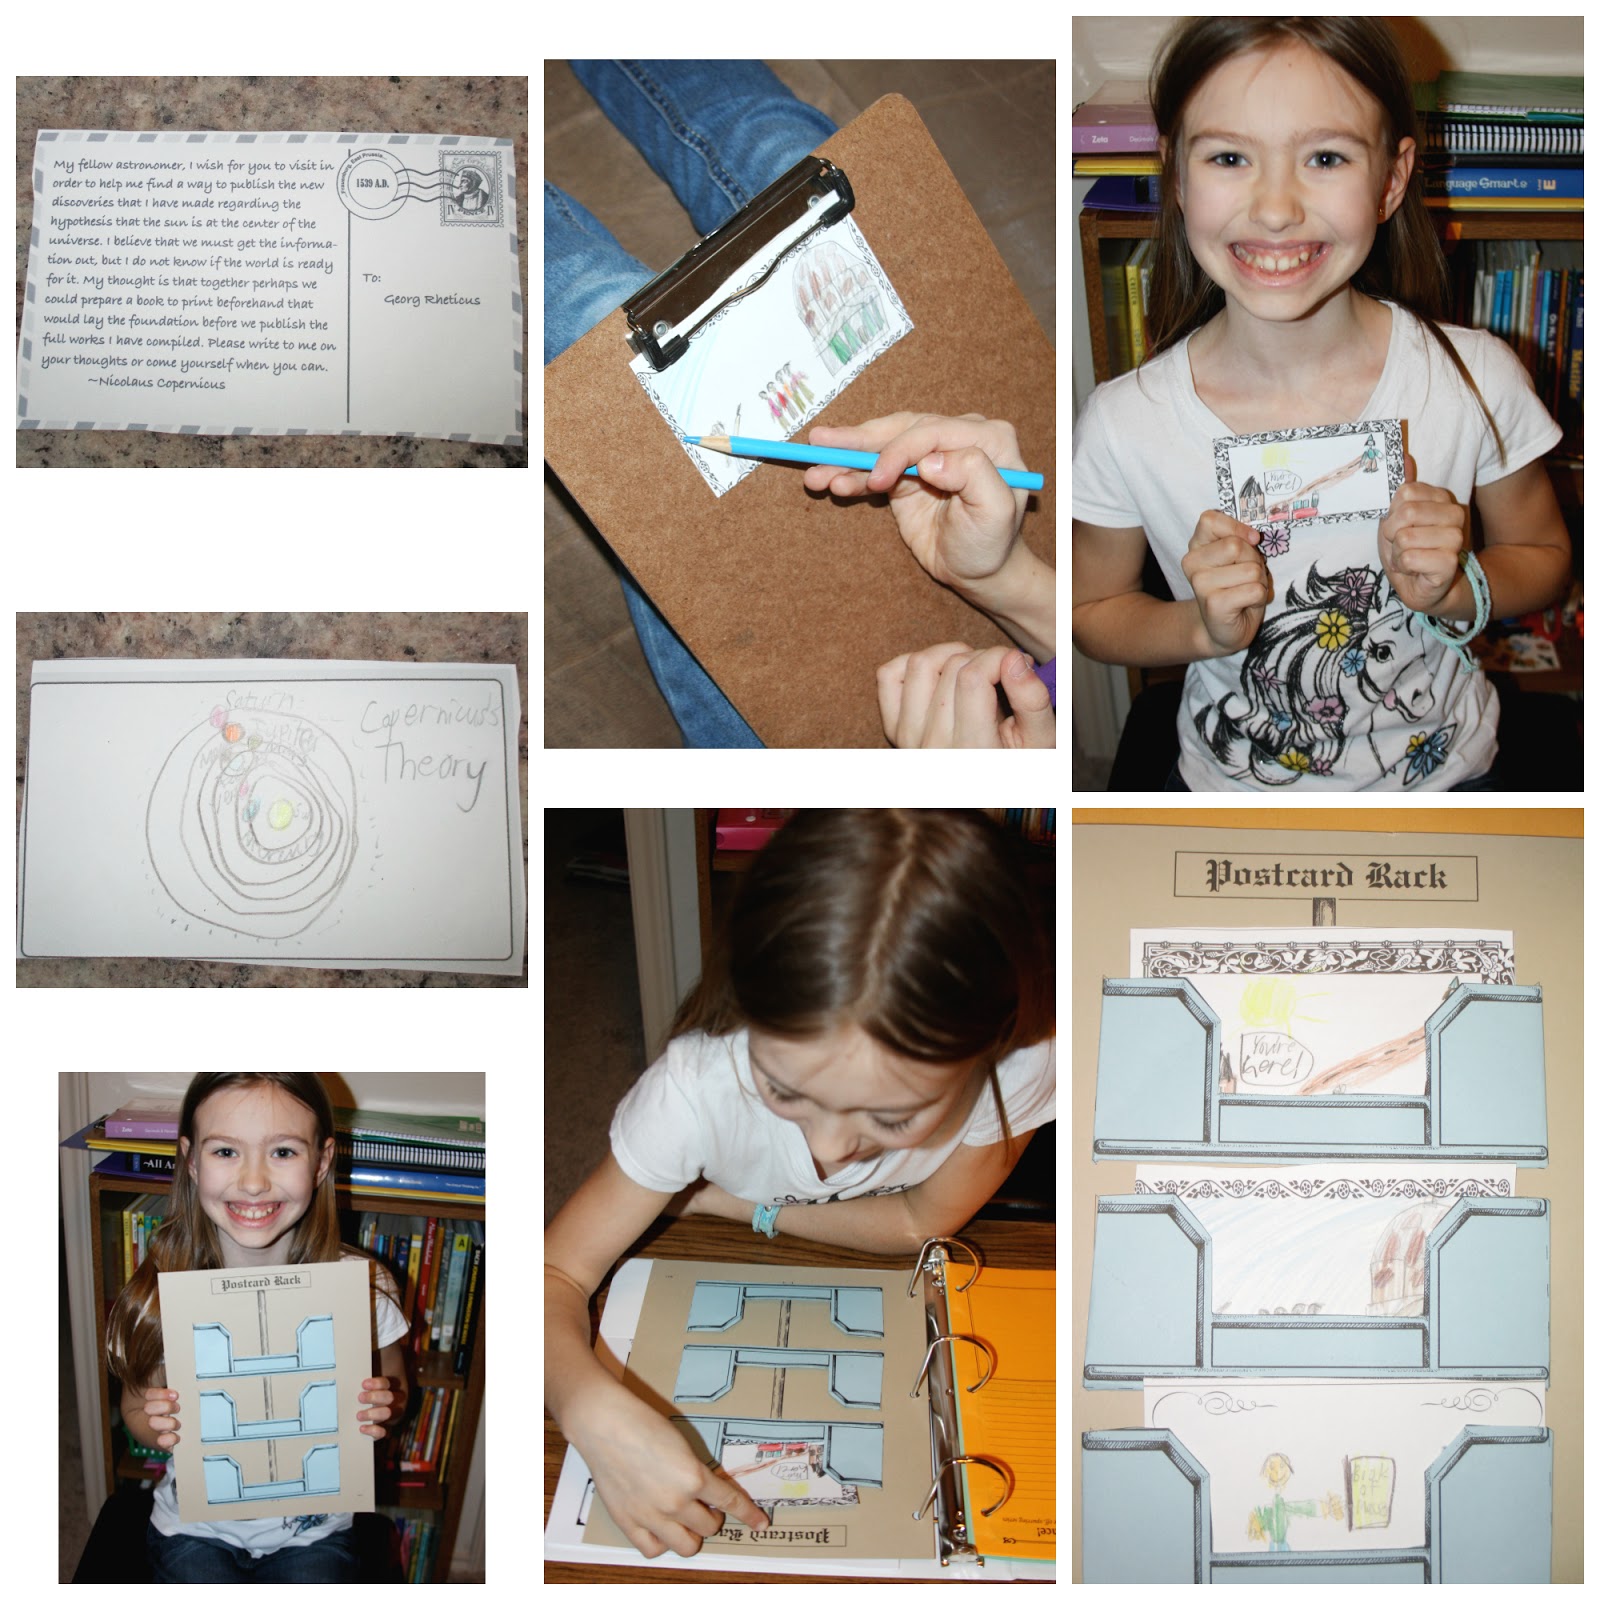
Postcard Rack to store her postcards during Stop #1. The bordered
Postcards were written from important or influential people during the Renaissance & Reformation time period. The individual would explain events or situational circumstances going on at that time. Alyssa would read the postcard for each stop and illustrate the important event or main idea on the back side of the card. For example, after reading a postcard written by Nicolaus Copernicus to Georg Rheticus she drew an illustration representing Copernicus's theory on the back of the card that would be a page in his book. The timeline, newspaper, and post cards are continuous activities that will be completed throughout the entire study.
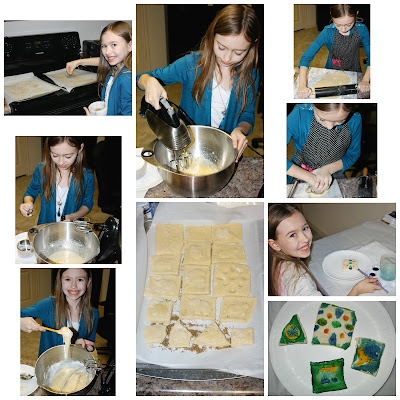
We made 3 of the recipes that were included in the
Dining Out Guide: A Booklet of Renaissance Feasting, because we both love to cook and bake. The Dining Out Guide was a lapbook piece. Most of the recipes we utilized were desserts or sides. We hope to utilize the recipes more before the end of the study. The first recipe we tried were the Cheese Krapfen. Our biscuits were very cheesy (fresh Parmesan) and had a strong yeast flavor. This was our least favorite recipe. However we loved the taste of the Rice Pudding and Applemoyse. We did add in the suggested extra sugar and vanilla extract to sweeten the Rice Pudding. This was a great snack. The Applemoyse tasted like homemade chunky cinnamon applesauce. We mixed in in our oatmeal the next day for breakfast.
 |
| Applemoyse, Rice Pudding, and Cheese Krapfen |
We attempted another recipe for Springerle Cookies during Stop #4 which was one of the ever popular Souvenir Craft Cards my daughter looked forward to completing. The recipe included a bulleted list of ingredients and tools in addition to numbered directions for the molded anise cookies which originated in the German province during the 15th century. My daughter loved baking and tasting these crunchy cookies. She said they tasted like black licorice. After these cookies dried for over 12 hours and were baked in the oven, Alyssa painted them with a mixture of almond extract and yellow, green, and blue food coloring. They were too hard for my sensitive teeth, but I thoroughly enjoyed the pleasant aroma that filled the house.
 |
| Souvenir Craft Cards |
 |
| Springerle Cookies |
All of her Lapbook mini-books and pieces were stored in a three-hole punched manila clasped folder in her History binder. The topics addressed so far were Defining Renaissance, Da Vinci: The Ultimate Renaissance Man, the Influences of Music During the Renaissance, Booklet of Recipes, and Ptolemy vs. Copernicus: The Battle of the Theories for Planetary Motion. Alyssa was intrigued with Da Vinci and researched more information about him using online resources and books. Learning more about Da Vinci and creating the Dining Out Guide were the highlights of the lapbooking projects.
The 3D projects were an added bonus. We're still looking for a box and she's coloring the stage pieces so she can set up her Shakespeare Globe project. I am sure she'll use the puppets to act out stage performances.
The Timeline printables were provided for this particular historical time period (1100 AD through 1660 AD), three-hole punched, and printed on green cardstock during Stop #1. Timeline figures and Teacher Keys were also included in the Master templates. This timeline served as a great visual overview or reminder of the studied topics.
 |
| Timeline Up Close |
We aimed to complete at least 1-3 creative writing assignments during the review period. One writing assignment that was consistently completed was the Renaissance Reporter Newspaper articles. She created advertisements and wrote article summaries about specific topics related to the study. The newspaper templates were printed on bright orange copy paper. Her two favorite articles to research were about Leonardo da Vinci and Michelangelo.
Alyssa also explored several
Art Techniques and Mediums during this study. She learned about linear perspective, egg tempera painting, two-dimensional chiaroscuro pencil drawings, fresco secco water color painting, and drawing with colored chalk pastels. She learned that "chiaroscuro" in Italian meant light-dark. Then, she practiced using shadows and highlights in her pencil drawing giving it a more realistic effect. We set up a still life to help with the chiaroscuro and chalk pastel activities. Specific directions were provided too.
 |
| Chiaroscuro Pencil Drawing |
 |
| Chalk Pastel Fruit Still Life Drawing |
There were eight Audio Tours led by, Agatha, the tour guide of Da Vinci Tours. Alyssa listened to three of them as indicated in the study while coloring projects or coloring sheets found online. She also listened to them during meal times, breaks, and before bedtime. She really enjoyed listening to the audio about Michelangelo & Rome. She searched for a book about him so that she could see a picture of the Sistine Chapel ceiling masterpiece. The audio tours are exciting and very informative.
This study integrates a variety of subjects such as History, Art, Music, Reading/Literature, Writing, Science, Geography, and more. We haven't reached the stop that incorporates mapping into the study yet, but I love that my daughter will be learning about relevant geographical areas. There is so much more that we haven't yet explored. We also haven't hit any stops with file folder games for game night (chess), but we know the activity is right around the corner.
Overall Thoughts and Results
My daughter's favorite activities were the souvenir craft card hands-on projects and recipes. These activities really captured her attention and interest. Two of her favorite activities were the
Masquerade Mask and
Fresco Secco.
She chose the feather and gem colors to use on her
Masquerade Mask at Hobby Lobby. We used a different type of glue than was suggested on the card. We ran into a few glue issues, but managed to resolve them and complete the mask.
 |
| Masquerade Mask |
A Fresco Secco is artwork painted on dry plaster which is the canvas. Alyssa didn't like the idea of cracking her art project, but we were careful and tried not to mess up her watercolor painting. She also wished that we had a mold for the wet Plaster of Paris, because she didn't like spreading the plaster. My daughter lightly sketched an image on the fresco canvas with a pencil and after painting it sealed it with glue to preserve it. She learned that "fresco" meant "fresh" in Italian and that the Sistine Chapel was known as a Buon Fresco.
 |
| Fresco Secco Fruit and Veggie Bowl |
Alyssa is drawn to music, theater, and arts so this History study was a perfect fit for her. She retained and understood the content more using this study. She can't wait to make the Circlet. We also already have plans to go to a Renaissance festival the beginning of March.
I appreciate that the study was organized into individual stops. It was easier to print all the corresponding materials at the same time. I didn't need to add anything to the study except for a few
optional books mentioned on their
Additional Resources list to enrich and enhance learning. This tool contains a list of books, music, audio books, video, and more. This study enabled me to effectively teach my daughter about History during the Renaissance & Reformation era.
One of my favorite aspects of this well organized study is the flexibility with lesson planning. I have control over what my daughter studies and to what depth we study the topic. We can choose to spend days studying a topic or briefly stop for a visit. The detailed instructions were written in a step-by-step manner which makes it easier to finish projects. I loved being involved in the study while still offering Alyssa the opportunity and freedom to work independently. She enjoyed choosing study topics of interest and projects with me too.
We are currently working through Stops #8-10. The Shakespeare Globe Souvenir Card project and Sonnet from Stop #8 are taking much longer than expected. There's so much coloring and cutting for the stage and puppets. You may want to pre-cut the pieces for your child. My daughter said that the sonnet is difficult to write because you have to rhyme and use a certain number of syllables. I don't recommend this type of poetry for younger children.
We are also looking forward to reading more about this time period. We will definitely continue using the study, but at a slower pace so that we can dig even deeper. We were thinking about going back a few stops to complete more craft projects and recipes once we have some extra cash since Alyssa loved those activities. History is one of my daughter's favorite subjects now thanks to Home School in the Woods.
Recommendations
So stock up your ink and get your printer ready . . . this study will bring smiles and fun your way. Remember you don't have to do everything. Choose what works best for your family. I
HIGHLY recommend Renaissance & Reformation. This engaging study will appeal to individuals implementing a Unit Study, Thematic, Activity-Based, Eclectic, Charlotte Mason, or Classical approach in their homeschool. Visit their website to learn more. The study addresses all the learning styles so your child is sure to find something of interest especially if you have a hands-on learner.
Prices
Renaissance & Reformation Digital Download $33.95
CD Version $34.95
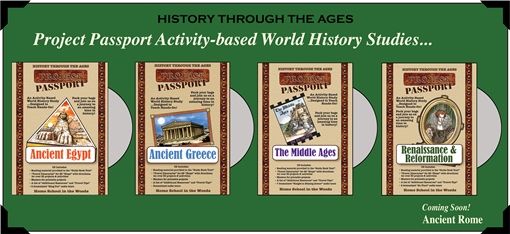
I'm thrilled to announce that
Home School in the Woods recently released a new
Ancient Greece study and an Ancient Rome study will be released in 2018. Both of which we hope to utilize in the near future. You can even check out their Ancient Egypt study if that is the time period you are interested in studying.
Social Media Links
Facebook
Twitter @HSintheWoods
Pinterest
Google+
Please check out the other Home School in the Woods product reviews at the
Homeschool Review Crew blog.